
Choosing Lighting for Indoor Hydroponics
Choosing a source of lighting for hydroponics is one of the most important pieces to being successful. It can also be the most expensive item you purchase for hydroponics, so you want to get this right! Thankfully, in our current day there are a lot of great options that won't break the bank. In this article we'll walk through several lighting options. We include links to specific grow lights we have used and found to be good quality. Some of these links are Amazon affiliate links, which means we make a commission if you make a purchase using the link (at no extra cost to you).
The Biggest Mistake New Growers Make When Choosing Lighting
The biggest mistake we've seen with new growers (including us back in the day!!) is choosing a light source that is too small or insufficient. Naturally, we want to lean towards something smaller and cheaper but trust us, you will regret it. The massive gain in production that you gain with a larger grow light is well worth it. You are already putting in the work and paying for seeds, nutrients, growing medium, etc., so don't handicap your system with a small light source.
We like to build and use hydroponic rail systems that grow a lot of produce and use space efficiently. Our recommendations are based on that style of growing. If you are looking to start with just a few plants, such as with the Kratky method, some of these options may be overkill, but you should be able to follow the same guidelines.
Let's go through the options for lighting for your hydroponic system.
Sunlight
If you are blessed to have a location with ample sunlight for most of the year, this can be a great option! It's free and on a natural timer. However, in most cases, if you are growing indoors it will be very difficult to find a location that receives enough sunlight. Simply placing your system next to a window will usually not give you the growth you are looking for (trust us, we've tried it). Also, if you live away from the equator, there are long portions in the winter where there is simply not enough sunlight to grow plants. To make this method work, you will need at least 6 hours of direct sunlight, and more in the winter when the sun is lower.
When we first started with hydroponics, we put our rail system next to a south-facing window and found out quickly it was not enough light. The plants grew very slowly and appeared "stretched", where the lettuce leaves were very thin and long.
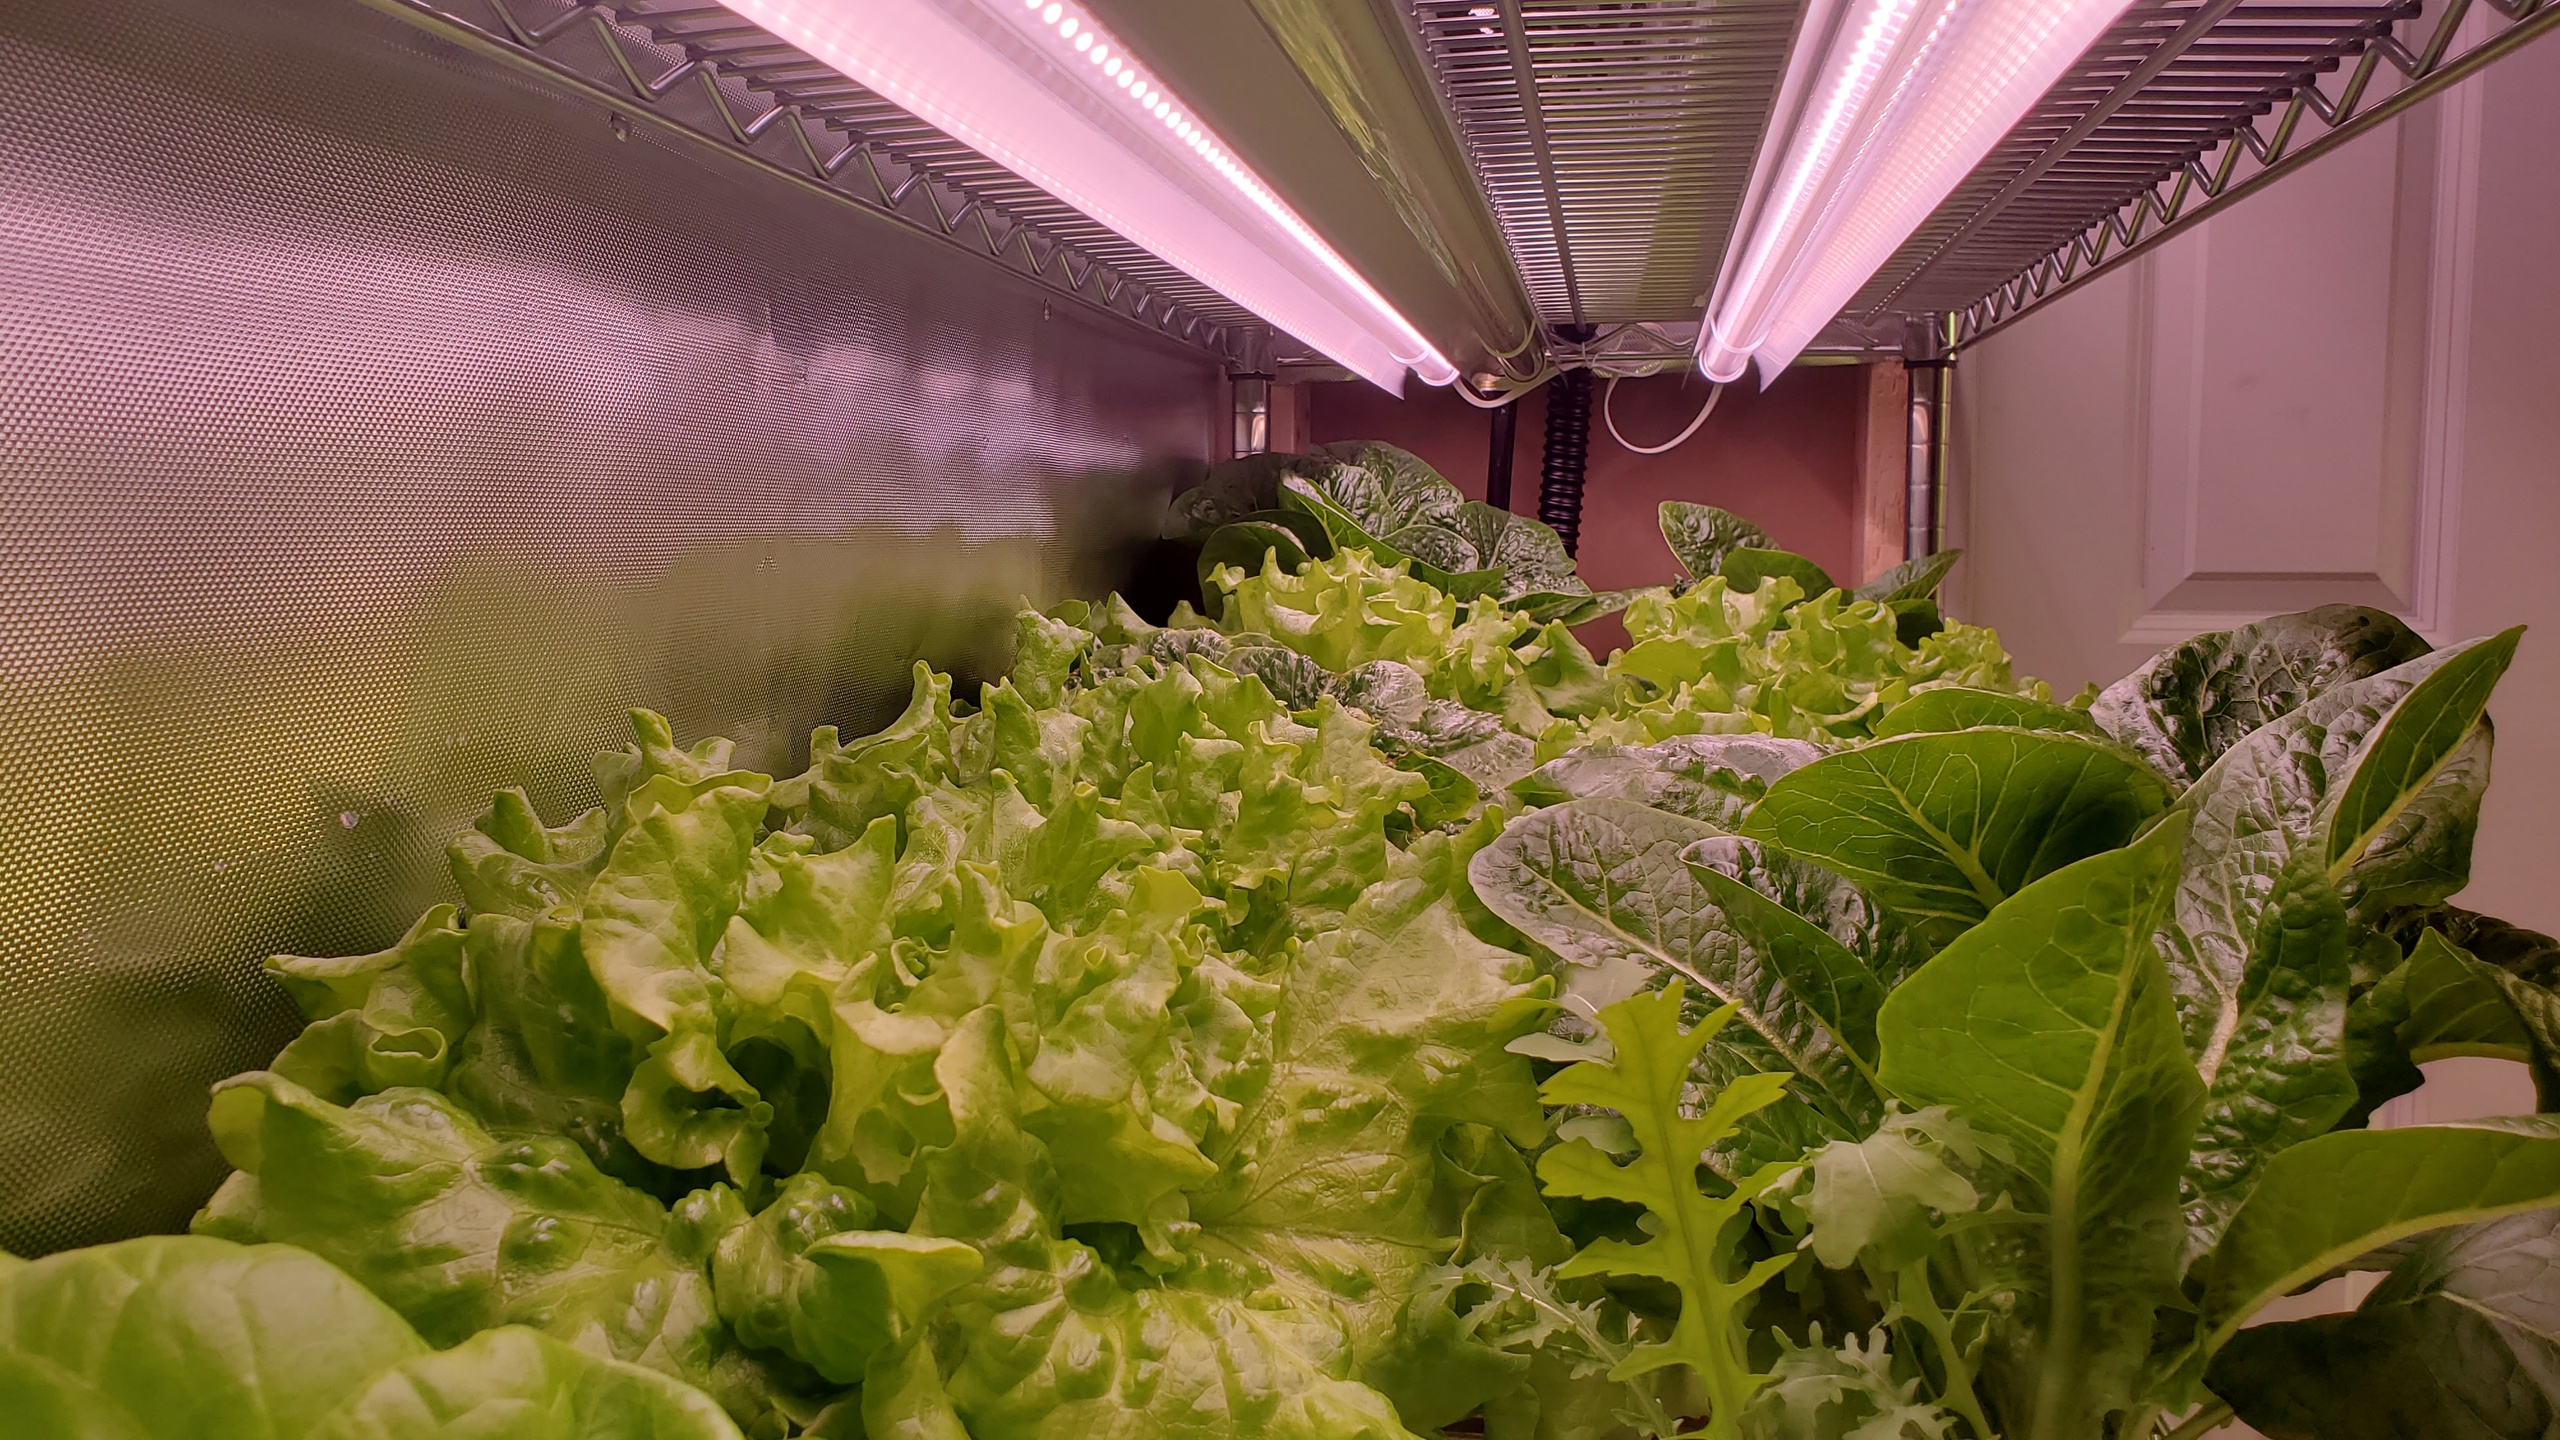
Fluorescent
Fluorescents are nice because they are relatively cheap and easy to find. T5 fluorescent tubes are among the most efficient fluorescents and are popular grow lights. We started our journey using fluorescents and they worked well. If you want to start cheap and simple and already have a fixture laying around, go with T5s. We would recommend a minimum of a 4 ft, 4-bulb light such as this one but a 6-bulb fixture is even better for a 2 rail system. The primary disadvantage of fluorescents is that they use more electricity than LEDs. Each bulb is 54 Watts.
LED
LED lighting is the best option, and we've switched over entirely to LED for all of our systems. LEDs are much more energy efficient than other options and they've produced better yields for us - a win-win. There are a number of options for LED lighting. If you have a fluorescent fixture already, you can buy LED tubes that fit into a regular T5 fluorescent fixture. Each bulb uses 24 Watts - less than half the electricity of the fluorescents. You can also purchase a full fixture with LED bulbs.
We are also using a Mars Hydro TSL 2000 LED grow light and have had good results so far. It is much more compact and less weight and yet is extremely bright! It has a dimmer which allows us to adjust the lighting to the intensity we need. If you want to jump straight to LED this would be a good option. It has plenty of light coverage for a 2 or 4 rail system. It also includes adjustable ratcheting hangers which is nice if you are hanging from a ceiling. At full brightness this light is rated for 300 Watts but uses less when its dimmed.
Another great option, especially for vertically-stacked systems, is individual LED tube fixtures such as these. Instead of a fixture with 4 or 8 tubes built in, each of these fixtures can be placed separately and linked together. They are the lowest-cost option we've found and they work great. For lettuce, you just need 3 fixtures for a 2 rail system, placed about 15 inches above the top of the rails. These hang really nicely from vertical racks with the included zip ties, but they would be harder to hang from a ceiling or similar because you have to hang each one individually.
Maximizing Your Light Source
Reflective Material: A simple way to maximize your light source is to use reflective material around the edges of your grow area. This redirects light that would otherwise be unused back towards your plants. We've used tacks to stretch the material along a wall behind our system or between supports.
Hanging: For hanging the lights, we have hung the lights from their built-in hangers if the location allows for that. However, in cases where the hanging point is higher than needed, we've used adjustable ratcheting hangers. They provide quick height adjustability and allow for easy experimentation.
Schedule: To control the lighting cycle and reduce the amount of work for us, we use a Wi-Fi connected smart plug. This allows us to have the plant lights to turn on and off automatically. They are inexpensive and provide a simple way to create a consistent lighting schedule with very low maintenance. We set our timer to turn on at 8 am and turn off at 10 pm, which is 14 "on hours" per day.
Air Circulation: Be aware that artificial lighting will create some heat. In our climate this is totally fine in the winter but can raise the temperature too high in the summer months. To combat this, we've used a small clip fan to push out warmer air that collects between the light and the lettuce. The fan can be plugged into the light itself or the timer so it only runs when the light is on. A fan can also help grow rates as it circulates CO2 around the plants, promoting photosynthesis.
Are you looking to set up a highly-productive hydroponic system? We have a free guide with step-by-step instructions on how to build a hydroponic rail system! We also have detailed courses that show every step in the hydroponic growing process.
